Table of Contents
- 1. Installation
- 2. Deactivation / Uninstallation
- 3. Overview Pages
- 3.1. Navigation / Overview / Pages
- 3.2. Plan view
- 3.2.1. Plan View - Columns / Rows
- 3.2.2. Keyword filters
- 3.2.3. Card filter
- 3.2.4. Export cards (PDF)
- 3.2.5. Show Card ID
- 3.2.6. Print stand
- 3.2.7. Manage Plan
- 3.2.8. Create a card
- 3.2.9. Highlight Group Filters / Groups
- 3.2.10. Hide/show columns
- 3.2.11. Inbox folder
- 3.2.12. Used folder
- 3.2.13. Ordner "Ablage"
- 3.2.14. Bin folder
- 3.3. Usage
- 3.3.1. Card icons
- 3.3.2. Moving cards (Drag and Drop)
- 3.3.3. Card groups
- 3.3.4. Display of linked cards in Issues
- 3.4. Assignment of rights
To install Agile Visual Board in your Jira installation, follow these steps:
Log into your Jira installation as administrator.
Select Plugins from the Admin drop-down list.
Select "Manage Add-Ons" on the left side.
Search for "Agile Visual Board" for Jira using the search box. The appropriate add-on version appears directly in the search field.
Select "Install" to receive "Agile Visual Board" for Jira. Jira starts immediately with the download and installation.
To disable Agile Visual Board on your Jira installation, follow these steps:
Log into your Jira installation as administrator.
Select Plugins from the Admin drop-down list.
Select "Manage Add-Ons" on the left side.
Look for Agile Visual Board in the list of your installed add-ons and open the options by clicking the arrow.
Click on "Deactivate", the plugin is deactivated and is no longer available.
To uninstall Agile Visual Board, follow these steps:
Log into your Jira installation as administrator.
Select Plugins from the Admin drop-down list.
Select "Manage Add-Ons" on the left side.
Find "Agile Visual Board" in the list of your installed add-ons and open the options by clicking on the arrow.
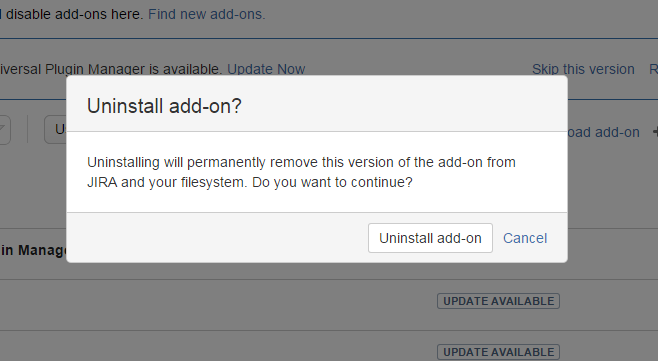
Click "Uninstall". A window appears in which you can confirm the uninstallation.
Click on "Uninstall Add-On" to uninstall the add-on. A window appears in which you can enter a reason for uninstalling "Agile Visual Board". If required, you can leave an individual comment in the text field or transmit the deactivation without feedback.
Click on the button "Send feedback" to complete the uninstallation.
When the plug-in is installed and activated, the icon for "DAC" appears in the JIRA menu bar on the left-hand side of your project bar. The menu option serves as an entry point to plan management.
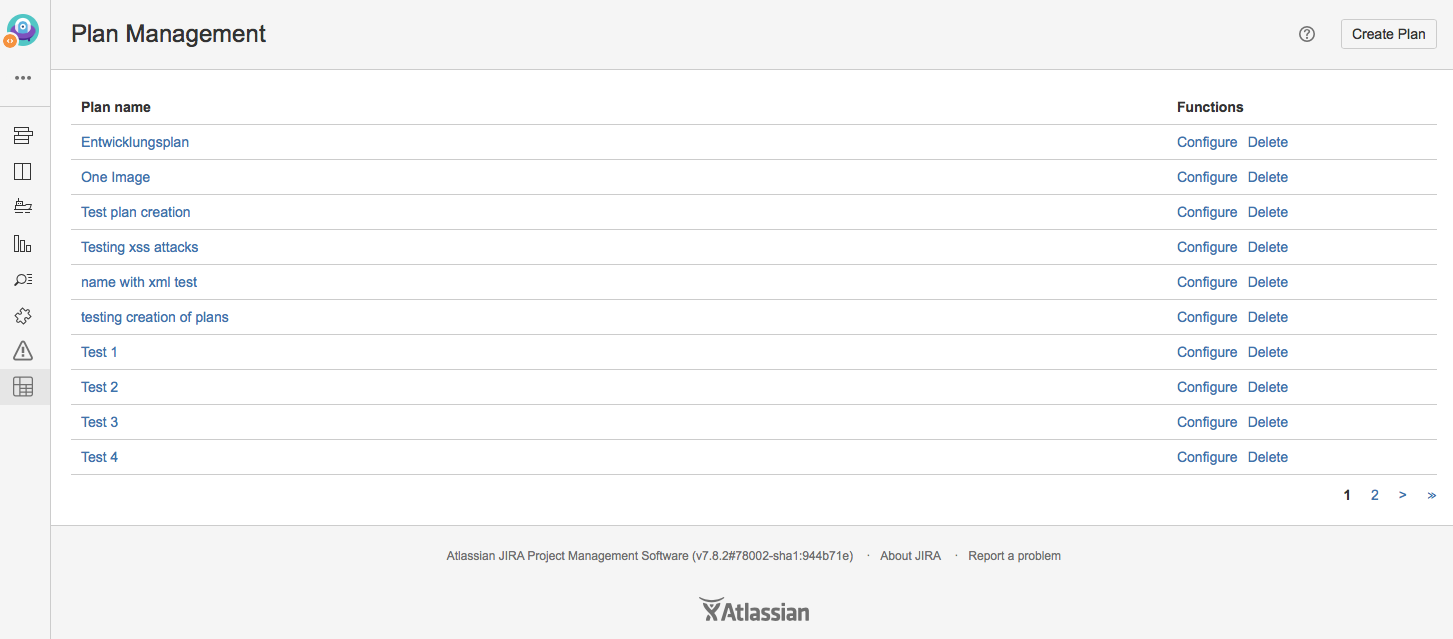
In the planning management, all plans created so far and visible to the logged in user are displayed in a list. The planning name, the JIRA project, and other functions such as configuration and deletion are accessible for each individual plan.

A new plan can be added via "Create planning". You can create a new plan by clicking on the "Create plan"-button. In the new dialog the title, the later name of the plan, and the JIRA project are assigned. All fields are mandatory.

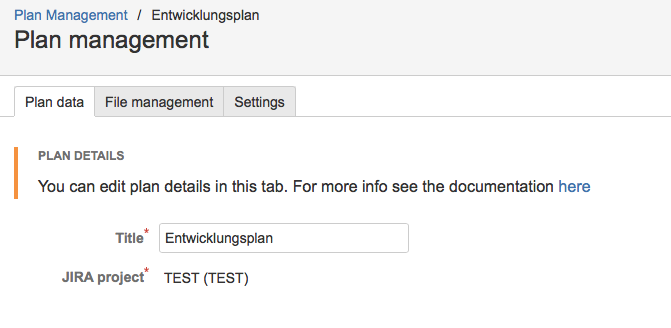
In the plan management of the plan, which you can access via the "Configure" link on the start page, you can edit the plan header data, add images and adjust various settings of the plan to your own requirements. All changes or adjustments in the plan management area are saved by clicking on "Save plan". The plan can be called up via "To plan" and then adjusted to suit the user's requirements. If you want to return to plan administration, you can do this via "Manage planning".
You can change and adjust the header properties of the plan in the plan data as required.
In theFile Management, images can be uploaded for use in the plan and deleted if necessary. "Select images" opens a browser-specific upload dialog. One or more image files can be selected here. The formats jpg, png, gif, tiff are supported, the upload of other file formats is not possible.

When one or more image files are selected for upload, a preview image,
the name of the file, its file size and two action buttons are displayed. With
"Start" a single image is uploaded and can then be used in the plan. The
progress of the upload can be followed on the green bar. Click on "Cancel" to
remove the image.
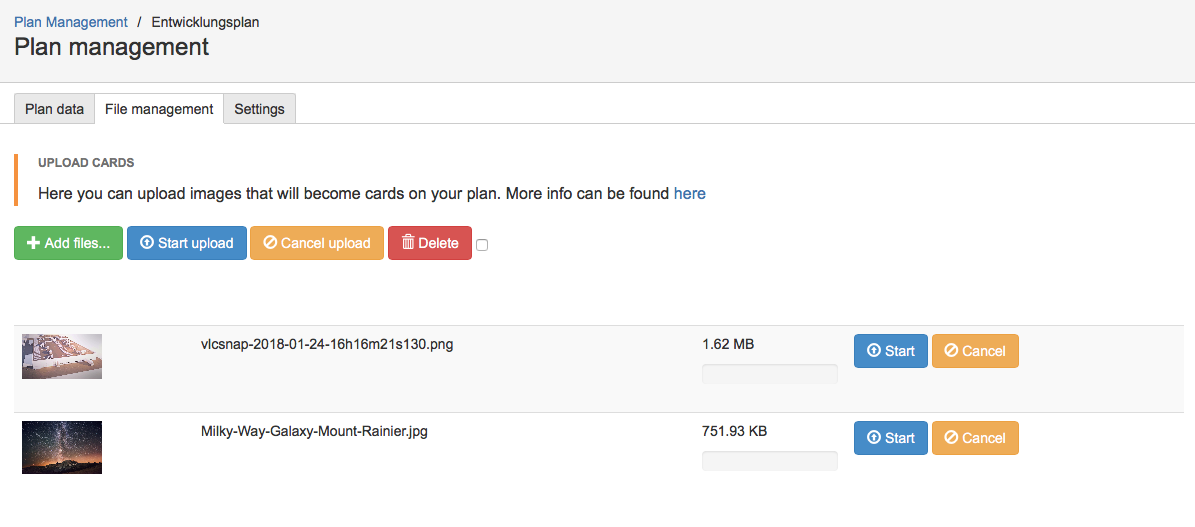
Via "Start upload" all selected images can be uploaded to the plan at the same time. The upload of the images can be cancelled by clicking "Cancel upload". When uploading multiple images, the large green bar shows how long all uploads will take. Furthermore, the current upload speed, the remaining upload time, the percentage of progress as well as the already uploaded and the total size of all selected files are displayed.
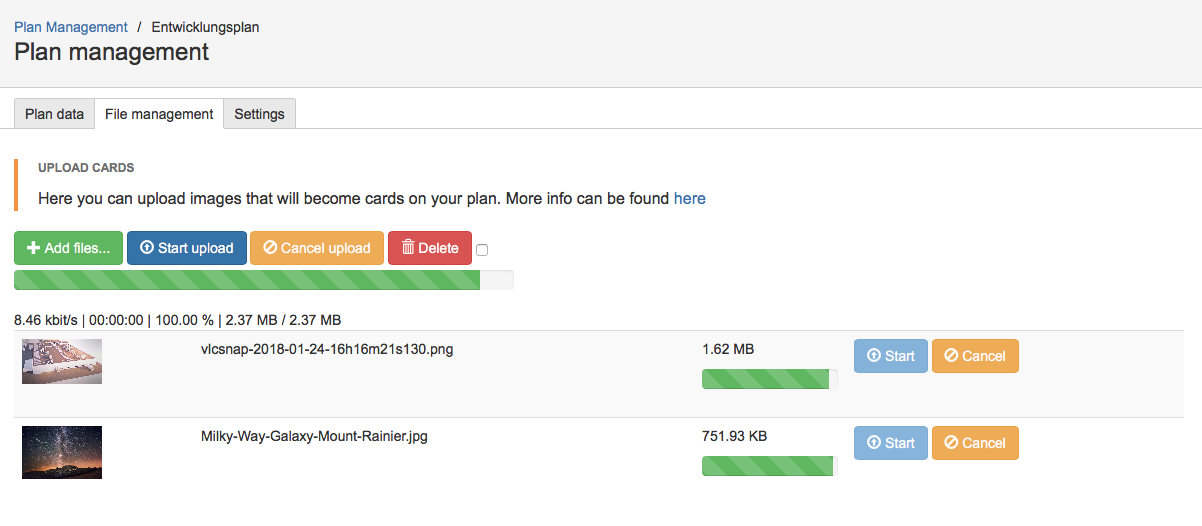
Uploaded image files can be removed by clicking the "Delete" button.
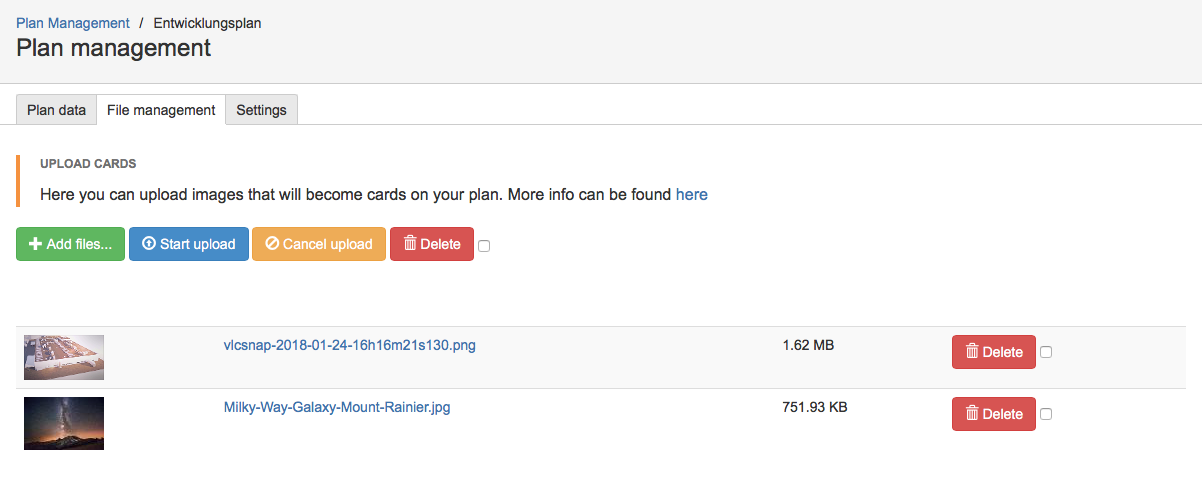
By clicking on the preview image or the name of an already uploaded file, this file can be viewed in full screen. You can use the arrows on the left or right edge of the dialog window to switch between all uploaded images. The full screen can be closed again by clicking on the "X".
Using the checkbox next to the "Delete" icon for all files already uploaded, one or more files can be selected and then removed using the central "Delete" icon. With the checkbox next to the central "Delete" icon all already uploaded files can be selected and deselected.
In the settings, the width and height of the card size and the card print size can be defined in centimeters (cm). The size of the card can be used to determine the size of the individual cards on the card. The size of the card print determines the dimensions for later printing of the plan. Only the first number after the decimal point is taken into account; for each subsequent decimal place, the value is rounded up from 5, otherwise rounded down.
Figure 10. Agile Visual Board - Plan Management - Settings
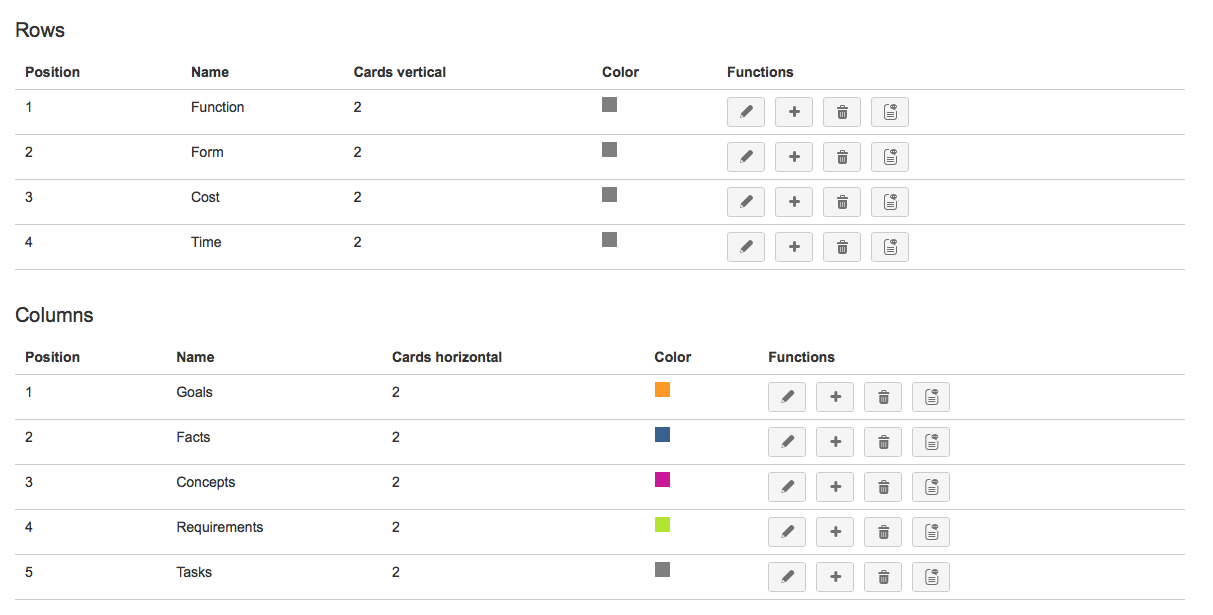
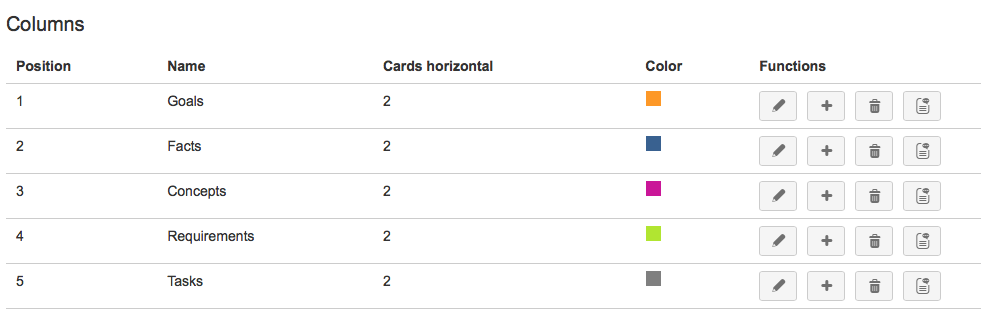
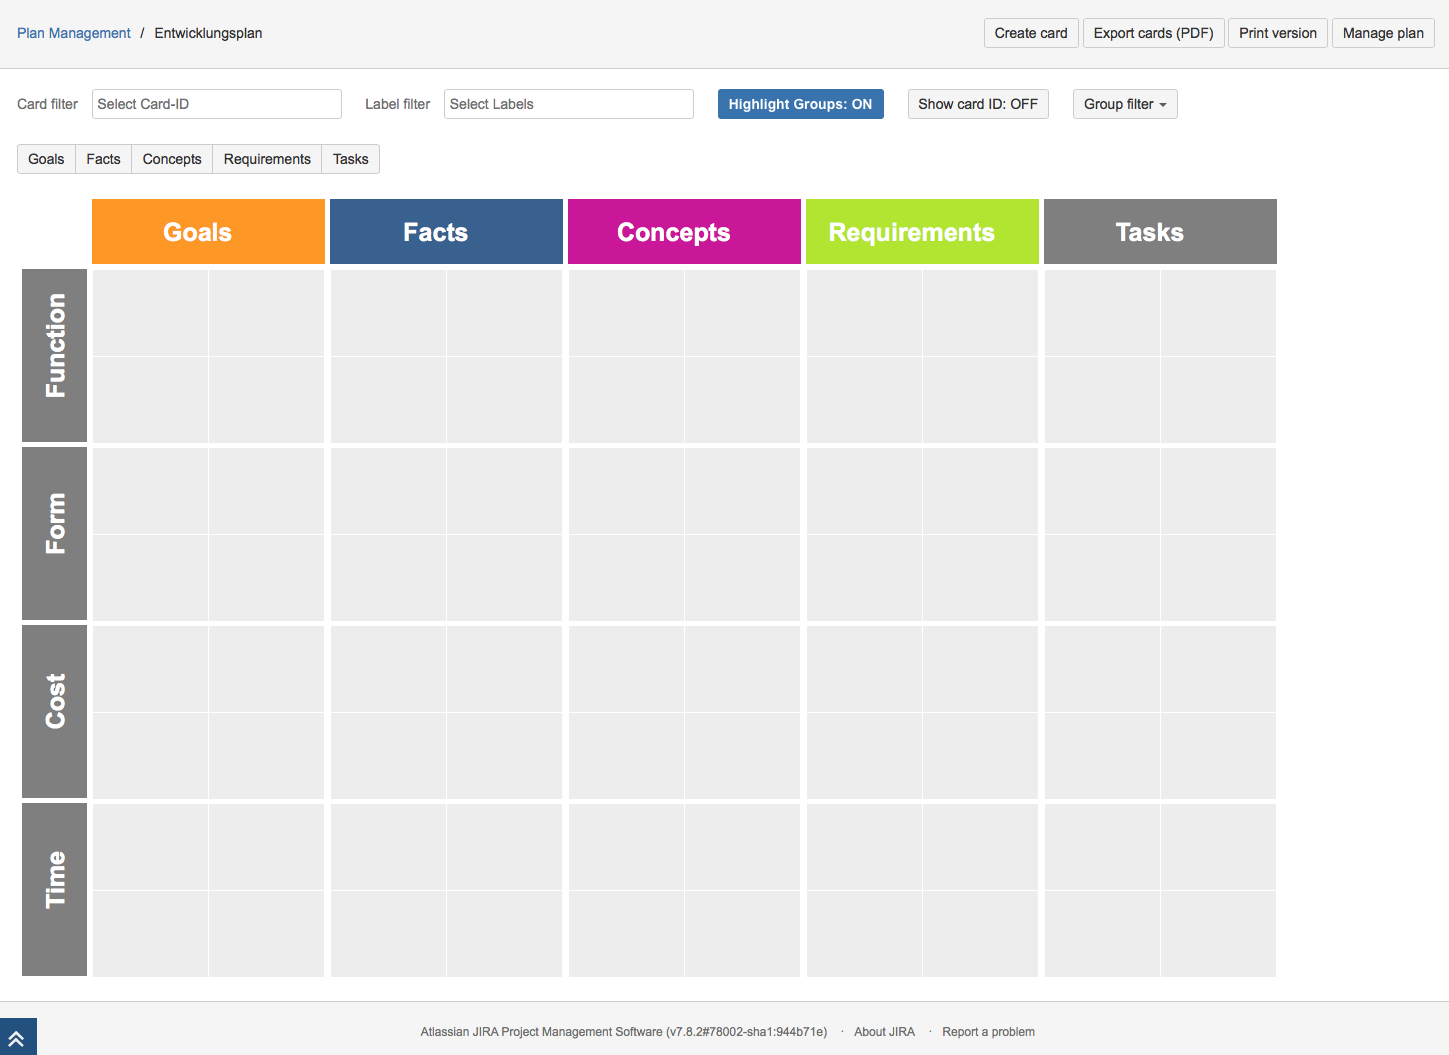
In the tables the rows and columns of the plan with position, name, number of vertical/horizontal maps, the defined colors as well as four function buttons each are displayed.
The position describes the position where the line is later in the plan. The name is displayed in the respective line. Afterwards the number of cards in vertical direction can be determined, the number of fields per row is determined. The selected color determines how the respective line is to be colored in the plan. Finally, there are the function buttons "Edit", "Create", "Delete" and "Manage translations". With "Edit" you can edit an existing line, with "Create" you can create a new line (this will appear below the currently selected line unless otherwise specified), with "Delete" you can delete a line and with "Manage translations" you can translate the line names into different languages.

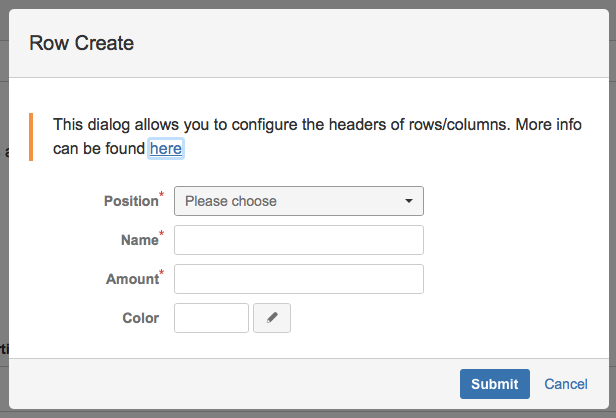
A new line can be added using the "Create" plus button. This opens a new dialog. Here you can select the "position" for the new line; the selection is limited to the current number of lines +1. The lines are arranged according to the selected position. Then the number of lines and cards can be determined. Finally, a color can be selected by clicking on the input field or the pen button next to it; it is also possible to enter the color directly in HEX code notation in the input field. The color selected in the color selection is adopted as HEX code in the input field and the border of the input field is colored accordingly. If no color is selected, the default color gray is used. Click on "Submit" to create the new line.
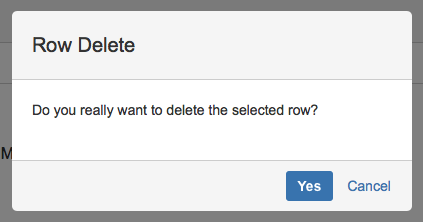
The "Delete" function button allows you to delete a line.
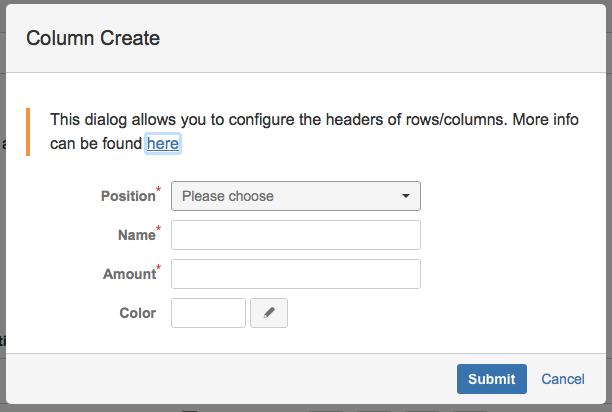
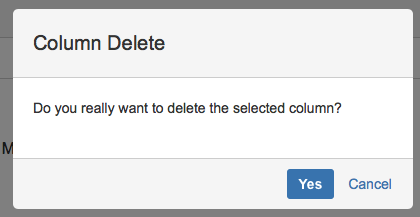
The position describes the position of the column in the plan. The name is displayed in the respective column. Then the number of cards in horizontal direction can be determined, the number of fields per column is determined. The selected color determines how the respective column is colored in the plan. Finally, there are the function buttons "Edit", "Create", "Delete" and "Manage translations". With "Edit" you can edit an existing column, with "Create" you can create a new column (this will appear below the currently selected line unless otherwise specified), with "Delete" you can delete a column if it is empty, and with "Manage translations" you can translate the column names into different languages.
A new column can be added using the "Create" plus button. This opens a new dialog. Here you can select the position for the new column, the selection is limited to the current number of columns + 1. The columns are arranged according to the selected position. Then the name of the column and the number of cards can be determined. Finally, a color can be selected by clicking on the input field or the pen button next to it; it is also possible to enter the color selection directly in HEX code notation in the input field. The color selected in the color selection is transferred as HEX code into the input field and the border of the input field is colored accordingly. If no color is selected, the default color gray is used. The new column is created using the Submit button.
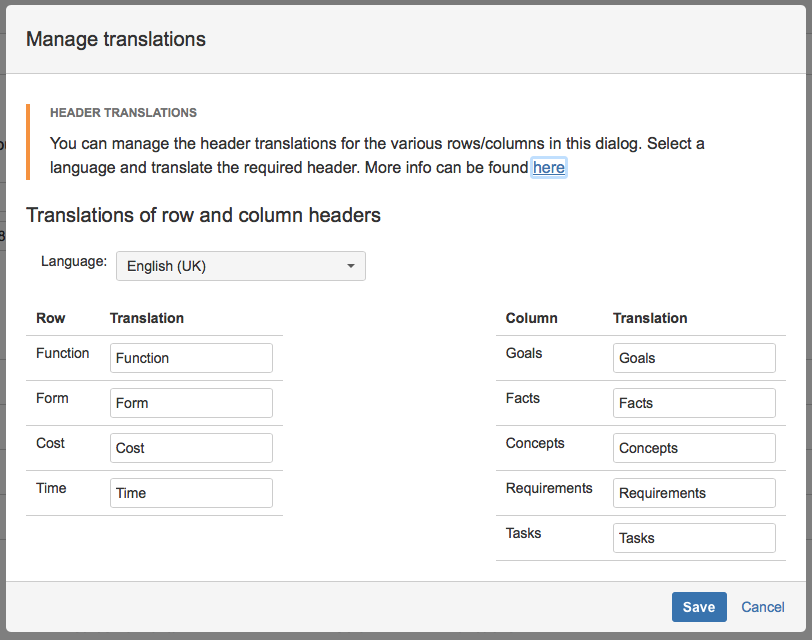
A dialog for editing the translations can be opened using the "Manage translations" function button after each line/column. In the "Language" combo box, the language for which a translation is to be specified can be selected. A translation can be entered in the input fields next to the row and column labels. The translation is used in the plan depending on the JIRA profile language selected. The "Save" button accepts the changes only for the currently selected language. A click on the "Cancel" button closes the dialog and discards the changes.
In the plan view, the settings you have made are displayed in plan management.
As soon as you move the mouse over a row or column header, a "+" and a"-" button appears next to the title. By clicking on the "+" button in a row header, the number of vertical cards is increased by 1 and decreased by 1 with the "-" button. In a column header, this also applies to the number of horizontal maps.
The keyword filter can be used to filter by stored keywords in the individual maps of the plan. Jira's related tasks and processes are taken into account.
The card filter enables the filters of the plan overview according to map IDs. Selected cards with the corresponding ID are displayed. All other cards are hidden as long as the filter is active.
In "Export cards (PDF)" all inserted cards are combined in a PDF for sending with all information about the individual cards.
With "Print status" you can print the current status of the plan, individual columns and rows can be selected and deselected for printing, "continuous plot" or "A3" can be selected as print format.
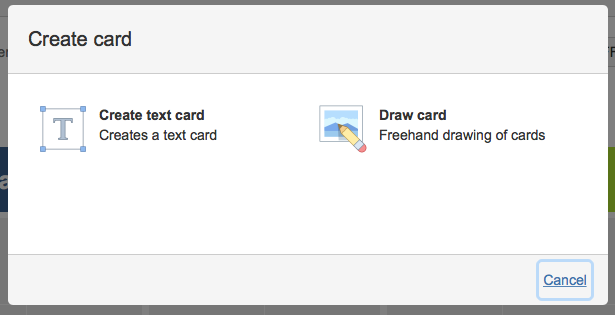
The Create Card dialog allows you to create "text cards" and "draw cards". Cards that are created using Create Cards land directly in the clipboard. They can then be moved directly onto the plan.
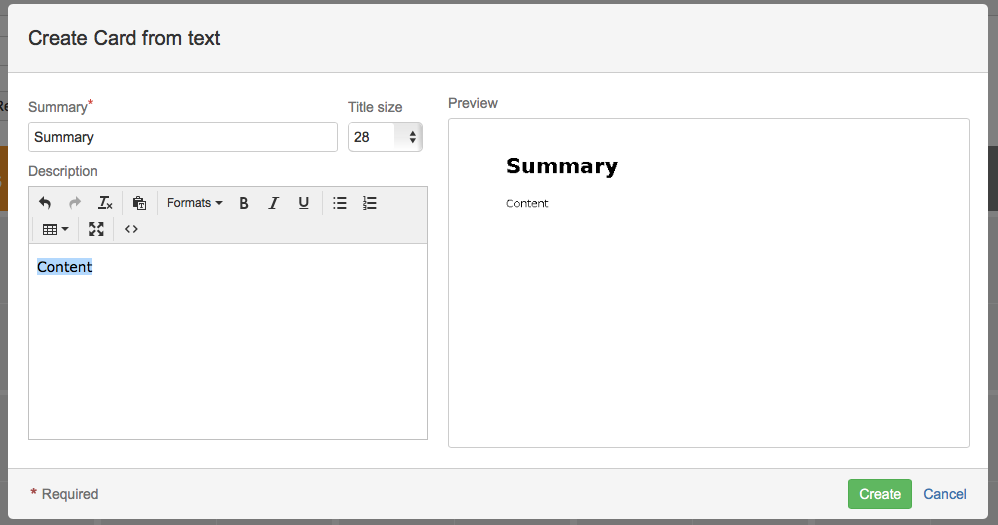
With "Create text card" you can create a card for the plan from a text input. To do this, you can insert a summary or heading and a description text, the size of the summary text can be determined individually and in the "Description" area, a normal text, but also tables or enumerations can be inserted.
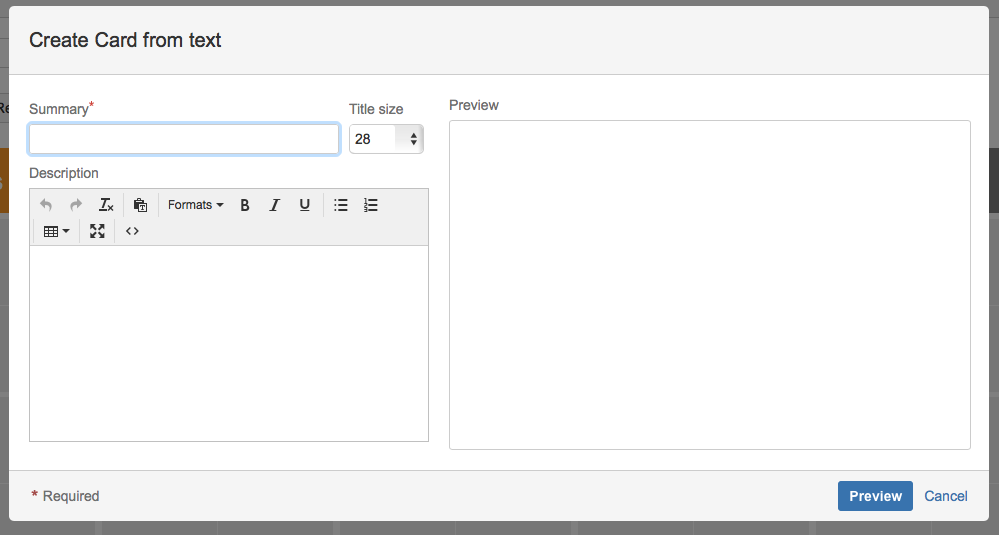
Click on the "Preview" button to view the contents of the map again. If you are satisfied with the content, you can create the text card using the "Create" button. Then the text card is stored in the input folder and can be used from there for the plan. Alternatively, you can also go to "Create text map" by clicking with the left mouse button on an empty cell of the plan and the created map is placed directly in the selected cell in the plan after completion of the dialog.
Click on the "Draw card" button to open the editor for freehand drawing of maps.
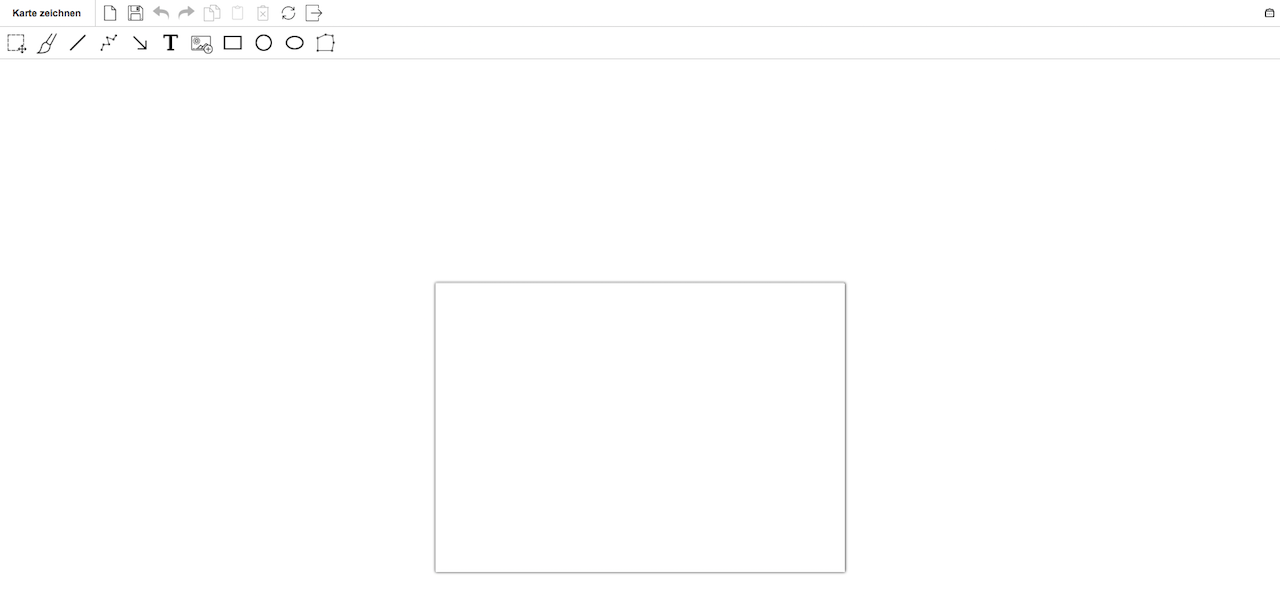
The following options are available for freehand drawing cards:

New - Empties the current document
Save - Saves the current drawn canvas as a map
Undo - Undoes the last executed step
Redo - Repeats the last undone step
Copy - Copies the currently selected element
Paste - Pastes the element currently in the clipboard again
Delete element - Deletes the selected object from the drawing area
Reset settings - Resets all selected drawing options
Close - Finishes editing the drawing card. If changes have been detected that have not yet been saved, a corresponding dialog appears.

Select
Selection
Select All - Selects all objects on the canvas
Deselect All - Deselects all selected objects again
Crop Image - Allows you to crop a selected image. All other elements are hidden when cropping an image.
Arrange
Move element to the front
Set elemnt to the back
Bring forward
Send backward
Align
align selected elements at the top
align selected elements at the bottom
align selected elements to the right
align selected elements to the left
center selected elements vertically
center selected elements horizontally
Distribute:
Distribute selected elements vertically
Distribute selected elements horizontally
Group:
Group - Create group from selected elements
Ungroup group
Layers:
Displays all layers with drawn elements. Individual layers can be hidden or shown.
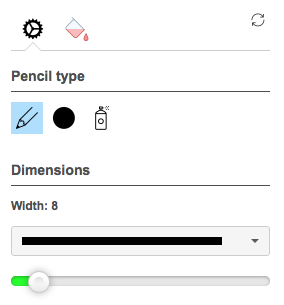
Pencil
Pen types
Pencil - standard pencil
Circle - Draw with circles
Spray - Drawing with spray can
Measurements
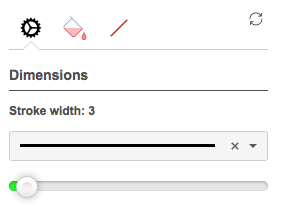
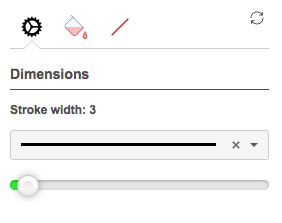
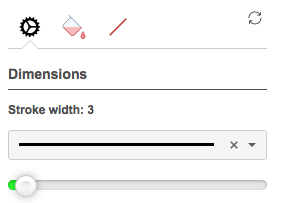
Determines the thickness / width of the pen, the preselection allows fixed defined widths. The slider allows a free selection of the thickness.
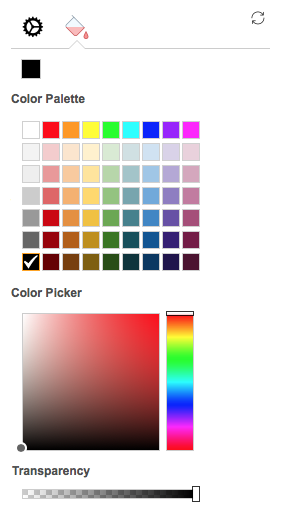
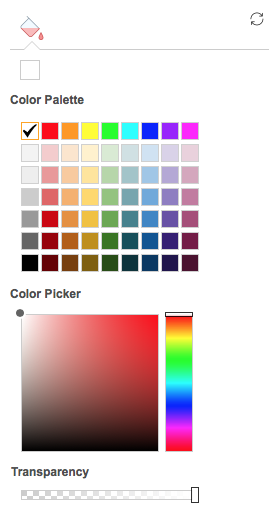
Fill color
Color palette allows the selection of predefined colors
Color selector allows the selection of freely definable colors
Transparency for the selected color
Line
Measurements
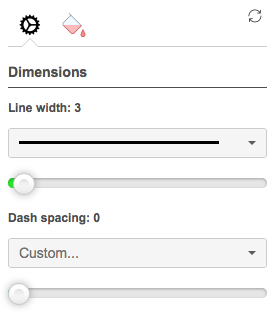
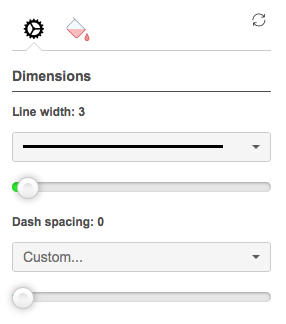
Line thickness - Determines the thickness / width of the line, the preselection allows fixed defined widths. The slider allows a free selection of the thickness.
Line spacing - Determines the line spacing of the line parts, the preselection allows fixed defined distances. The slider allows a free selection of the distances.
Fill color
Color palette allows the selection of predefined colors
Color selector allows the selection of freely definable colors
Transparency for the selected color
Polygon line
Measurements
Line thickness - Determines the thickness / width of the line, the preselection allows fixed defined widths. The slider allows a free selection of the thickness.
Line spacing - Determines the line spacing of the line parts, the preselection allows fixed defined distances. The slider allows a free selection of the distances.
Fill color
Color palette allows the selection of predefined colors
Color selector allows the selection of freely definable colors
Transparency for the selected color
Arrow
Measurements
Line thickness - Determines the thickness / width of the arrow, the preselection allows fixed defined widths. The slider allows a free selection of the thickness.
Line spacing - Determines the line spacing of the arrow, the preselection allows fixed defined distances. The slider allows a free selection of the distances.
Arrow
Arrow Type - Sets the arrow type (Open or Closed)
Arrow Direction - Determines the direction of the arrow (Destination, Source, Both Directions)
Fill color
Color palette allows the selection of predefined colors
Color selector allows the selection of freely definable colors
Transparency for the selected color
Text
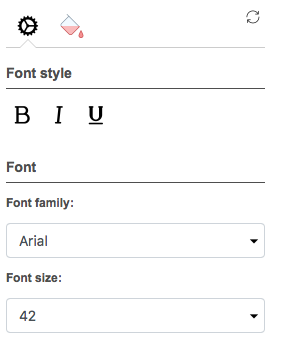
Font style
Bold
Italic
Underlined
Font
Font Family - Allows the selection of different fonts
Font size - Allows the selection of different font sizes
Fill color
Color palette allows the selection of predefined colors
Color selector allows the selection of freely definable colors
Transparency for the selected color
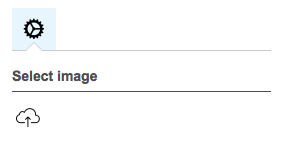
Image Upload
Upload image from computer - Allows you to add images from your computer to the artboard
Rcctangle
Measurements
Defines the line width of the rectangle
Fill color
Color palette allows the selection of predefined colors
Color selector allows the selection of freely definable colors
Transparency for the selected color
Line colour
Color palette allows the selection of predefined colors
Color selector allows the selection of freely definable colors
Transparency for the selected color
Circle
Measurements
Determines the line width of the circle
Fill color
Color palette allows the selection of predefined colors
Color selector allows the selection of freely definable colors
Transparency for the selected color
Line colour
Color palette allows the selection of predefined colors
Color selector allows the selection of freely definable colors
Transparency for the selected color
Oval
Measurements
Determines the line width of the oval
Fill color
Color palette allows the selection of predefined colors
Color palette allows the selection of predefined colors
Transparency for the selected color
Line color
Color palette allows the selection of predefined colors
Color selector allows the selection of freely definable colors
Transparency for the selected color
Polygon
Measurements
Determines the line width of the polygon
Fill color
Color palette allows the selection of predefined colors
Color selector allows the selection of freely definable colors
Transparency for the selected color
Line colour
Color palette allows the selection of predefined colors
Color selector allows the selection of freely definable colors
Transparency for the selected color
Fill Background
Use the Fill background option to colorize the background color of the drawing area.


All drawing options can be combined individually. The drawing is done directly on the drawing area with the mouse after selecting the corresponding tool. Once the map has been drawn, the map can be handed over on the map with the saving option. After saving, the card is placed in the input folder and can be used for the plan from there. Alternatively, a map can be drawn by clicking with the left mouse button on an unoccupied cell of the plan and the created map is placed directly in the selected cell in the plan after completion of the dialog.
You can use the group filter and "Highlight groups" if you have connected cards, this process will be explained later under "Card group".
With the column names below the keyword filter, the individual columns of the plan can be hidden and shown again.
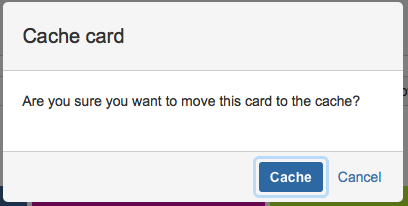
Use the blue button at the bottom left of the screen to open and close the folder selection bar for the uploaded / used images. On the right side of the button there is a selection box with the options "Input", "Used", "File" and "Trashcan".
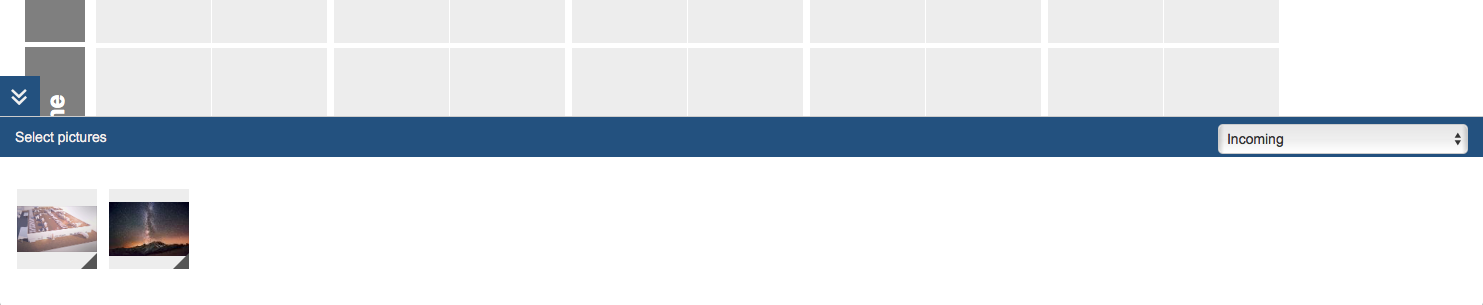
If "Inbox" is selected, images that have already been uploaded but are
not yet on the map will be displayed. Images in the "Inbox" selection can be
dragged and dropped onto the plan and stored in any field. If you move the mouse
over an image in the "Input" area, a double-arrow function button "Original
Size" appears, so that the image can be viewed in a new tab.
Images that are already on the plan are displayed in the "Used" selection. If you move the mouse over an image in this area, three two function buttons "Original size" and "Store" appear.

A click on "Original size" opens the image in a new tab in its original size. With "Store" an image already used on the plan is moved to the folder "File" and is therefore no longer visible in the plan. If an image is part of a group, you will receive an error message.
The "File" selection contains all images that have already been used on the plan but have then been removed. From this view, images can be moved to the trash can or drag & drop back to the plan. If you move the mouse over an image in this area, two function buttons "Original size" and "Delete" appear. A click on "Original size" opens the image in a new tab, a click on "Delete" deletes the image and moves it to the folder "Trash can".

The "trash can" selection contains all images that have been deleted via the clipboard. If you move the mouse over an image in this area, a "Original Size" function button appears. Click on "Original size" to open the image in a new tab and drag & drop the images back onto the plan.
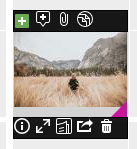
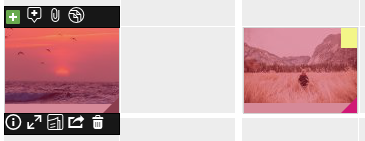
If an image has been dragged and dropped onto the plan, the function buttons "Task overview", "Comment", "Attachments" appear on its top side and "Card information", "Original size", "PDF export", "Split" and "Store" on its bottom side when the mouse is over the corresponding card.
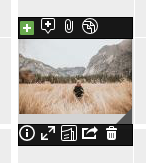
A click on the "+" icon opens a new dialog showing all JIRA tasks linked to this map.
By entering a keyword in the text box "Select process", existing tasks whose summary contains the keyword are searched for and displayed in a selection box. Several tasks can be selected and added by clicking on "Add". Now the key, the summary and a function button "Edit" are displayed. By clicking on the respective key, the summary or the "pen" button of the task you can open the detailed view of the respective process.
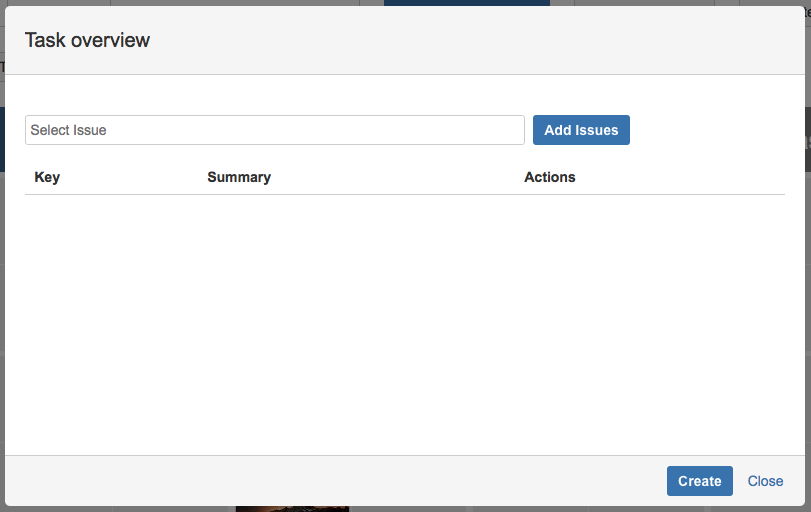
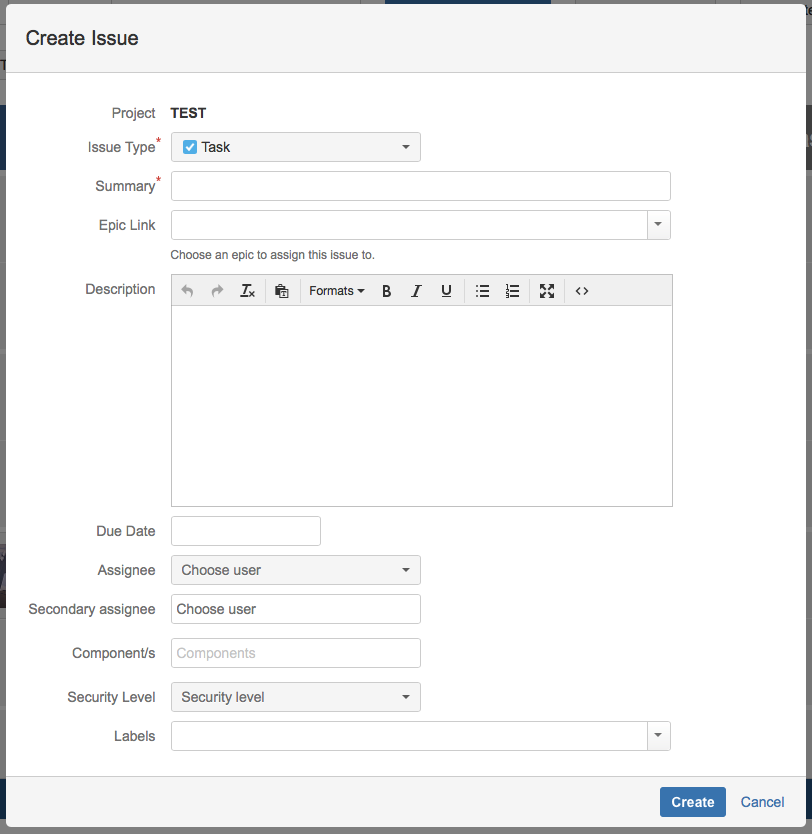
Furthermore, it is possible to create a new task by clicking on the
"Create" button. The dialog "Create process" appears, which can be confirmed
after entering the required data via the "Create" button. Click on "Cancel"
to close each dialog.
If a task is attached to the map, the grey triangle in the lower
right corner turns purple. This shows that a task has already been attached
to this card.
By clicking on the card symbol "comment - speech bubble symbol" you can add a comment to the respective card. A dialog opens for this purpose. The comment can be entered in the "Comment" field. By clicking on "Cancel" the changes are discarded. If you click on "Save", the "Author" and "Date" fields are filled in automatically and the dialog closes.
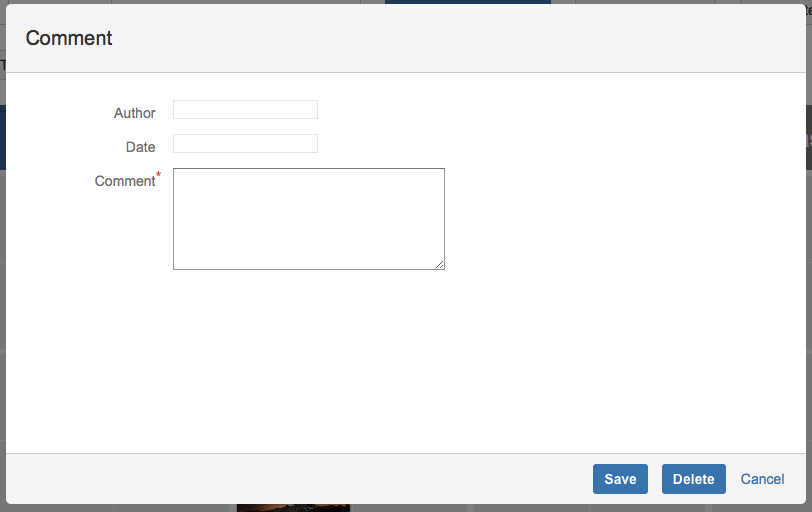
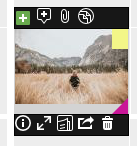
If a comment already exists for a card, you can recognize this by
the small yellow note in the upper right corner of the card. In this case,
the text boxes in the comment dialog are already filled in, but the comment
can be changed. An existing comment can be removed by clicking on the
"Delete" button.
By clicking on the card symbol "Attachments - Symbol "Paper clip"" a new dialog opens in which the attachments belonging to the respective map can be managed.
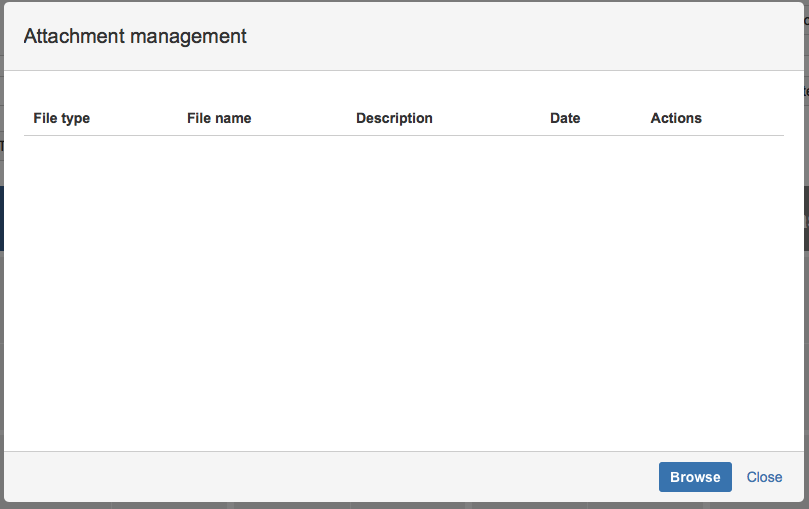
By clicking on "Browse", a new dialog opens from which a
browser-specific upload dialog can be opened using the "Select file" button.
A file of any type can be selected for upload. If desired, the "Description"
field can also be filled in before the attachment is uploaded to the server
by clicking on the "Upload" button.
The upload dialog closes and the uploaded file is listed in the overview of the attachments of the respective card. Click on the file name to open the attachment in a new browser tab. An uploaded file can be removed from the attachments of the card with the "Delete" button.
Card information can be called up by clicking on the symbol "I". Card information summarizes all other dialogs such as general information about the map, linked processes, attachments and map / version history. In the long term, all information and functions will be available via card information.
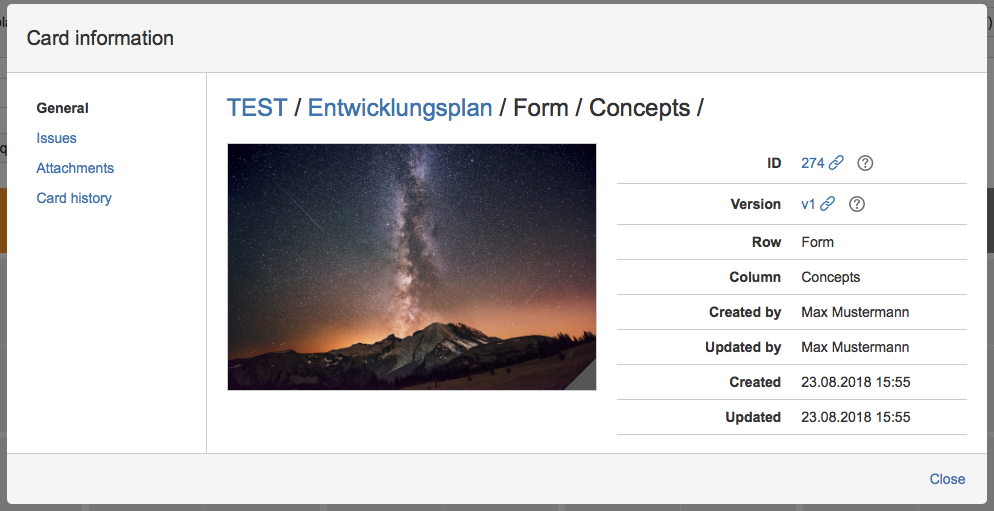
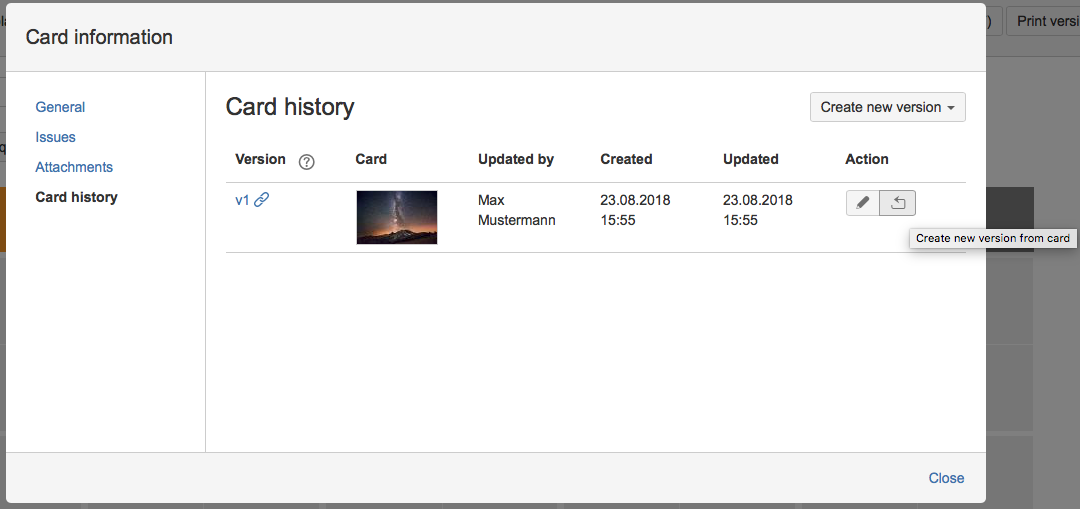
The map history allows you to manage the version of a map. Many versions can still be created for cards. The map history provides an overview of the previous versions of a map as well as the options to edit and duplicate the existing version and to create a new version based on the current version.
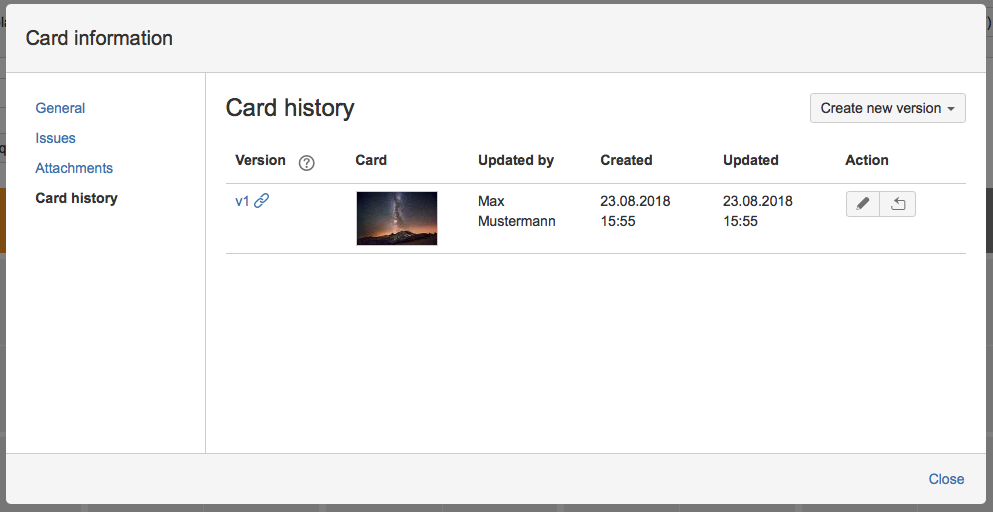
A new version of an existing version can be created as a duplicate. Please use the function "Create new version of map".
When a new version of a map is created, the new version is set as the current version. Please confirm the following dialog.
Figure 63. Agile Visual Board - Card History - Create new version of existing version - Confirmation

No information is lost when you create a new version. The top version is displayed on the plan.
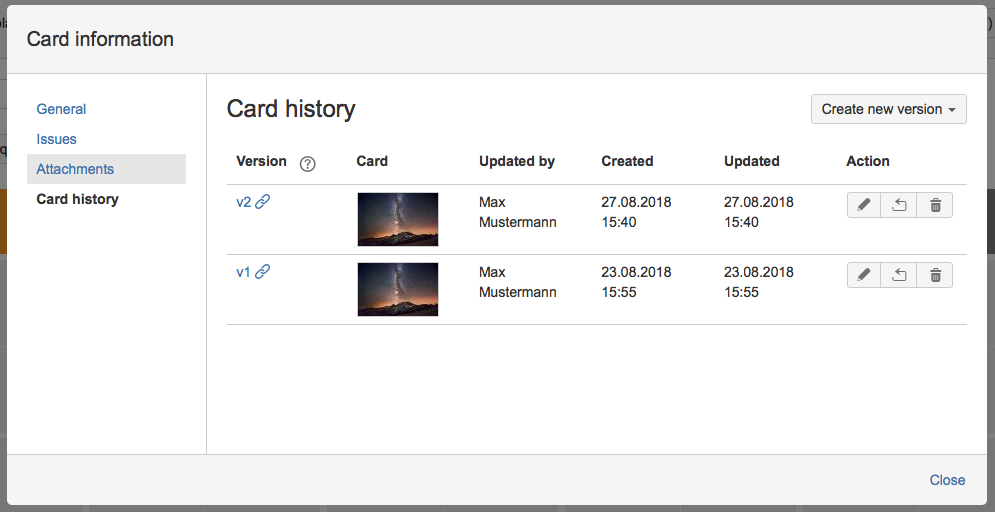
Versions can also be edited directly. Use the pencil icon.
Figure 65. Agile Visual Board - Card History - Edit Version

Via the selection field "Update version" you can edit the existing version. Three options are available for this:
Text card
If the currently edited version is a text card, the existing content of the text card is reloaded and can be edited again.
Draw card
If the currently edited version is a drawn card, the existing content of the drawn card is reloaded and can be edited again. If the currently edited version was originally a text card, the content of the text card is transferred to the drawing screen. If the currently edited version was originally a picture map, the picture is transferred to the drawing screen.
Upload Card / Picture
Allows you to upload an image/picture card. If the currently edited version of the card was a text card or a drawn card, the version will be replaced with the image card.
A new / standalone version of a map can be created at any time without the need to present the previous version. Please use the selection field "Create new version". The following options are also available
Create text card
Creates a new version of a map as a text map.
Draw card
Creates a new version of a map as a drawn map
Upload card
Creates a new version of a card based on an image that is uploaded.
If a new version of a card is created, existing content from older versions is not used as a template.
By clicking on the "Original Size" button, a new browser tab opens, which displays the image of the respective map in its original size.
A click on this button leads to the creation of a PDF document containing detailed information on the respective map. This includes the project and plan name of the map, its associated image as well as attachments, tasks and comments to the card. You can also see the replacement history, which describes the history of the card with regard to your versions.
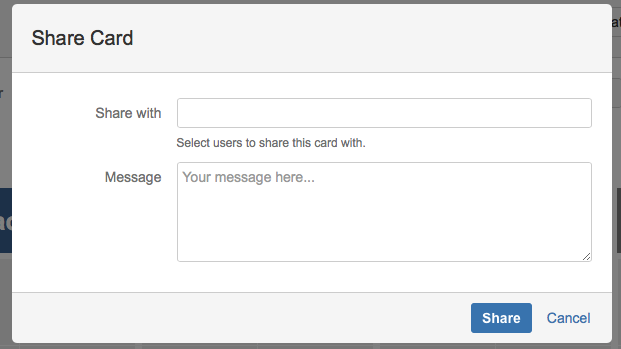
The card can be shared with other JIRA users by clicking on the "Share" button. A dialog opens in which you can enter one or more user names and a message. Click on the "Share" button to complete the process.
Cards / text cards stored on the plan can be moved as desired by drag and drop. A structuring/division of all available cards can be made with it.
This function offers the possibility to group different maps. Grouping can be done by drawing a card over another card. A new dialog opens in which you can select a name and color for the newly created map group. A click on the "Save" button now creates the map group. The dialog can then be closed by clicking on the "Close" button. Press the "Delete" button to delete an existing card group.

If you move the mouse over a card belonging to a card group on the map,
all cards of this group are marked with the color of the card group. In
addition, the "Card group" icon is displayed in the upper right area of a card
belonging to the group. A click on this icon opens the map group dialog again.
The highlighting of groups can be switched on and off with the
"Highlight group" button. The group filter can be used to filter by individual
groups, but all other images are hidden. If you click on "Select all", only all
groups are displayed. You can undo the selection by clicking on the selected
filter.
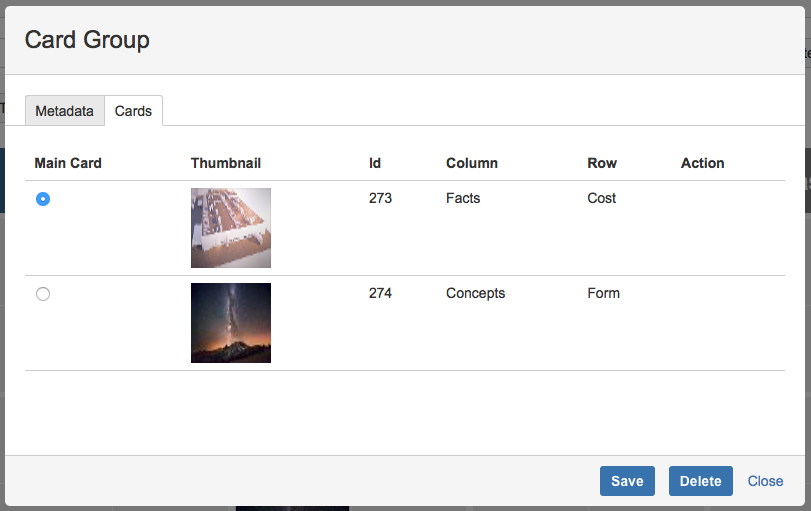
The "Maps" tab provides an overview of all maps belonging to the group.
The list shows the images of the maps, the map ID and the position of the maps
on the map. Use the "Delete" button to remove cards from the group. Furthermore,
it is possible to define a main card. If additional maps are to be added to an
existing group by "Drag and Drop", this is only possible by dragging the new map
to the main map. When you create a new map group using "Drag and Drop", the map
always becomes the main map on which another map has been drawn.

Rights are assigned via project roles. Three different roles are currently available to use Agile Visual Board. Jira system administrators have full access to the plugin and do not need separate rights.
Table 1. List of all rights
| Aktion | Jira Systemadministrator | Plan Admnistrator | Plan secretary | Plan User |
|---|---|---|---|---|
| Display Plan Manageent page | X | X | X | X |
| Configuring a plan | X | X | X | - |
| Display a plan | X | X | X | X |
| Add plan | X | X | X | - |
| Delete plan | X | X | - | - |
| Add cards to plan | X | X | X | - |
| Add cards version | X | X | X | - |
| Delete cards version | X | X | X | - |
| Reset cards version | X | X | X | - |
| Update cards version | X | X | X | - |
| Create text card | X | X | X | - |
| Draw card | X | X | X | - |
| Show card information | X | X | X | X |
| Change card position | X | X | X | - |
| Move cards into tray or trash can | X | X | X | - |
| Adding attachments | X | X | X | X |
| Delete attachments | X | X | X | X |
| Display attachments | X | X | X | X |
| Add your comment | X | X | X | X |
| Delete comment | X | X | X | X |
| Show comment | X | X | X | X |
| Create a card group | X | X | X | - |
| Delete card group | X | X | X | - |
| Show card group | X | X | X | X |
| Adding a card to a card group | X | X | X | - |
| Remove a card from a card group | X | X | X | - |
| Create and add tasks to card | X | X | X | X |
| Link issues to card | X | X | X | X |
| Display of linked Issues | X | X | X | X |
| Removing linked Issues | X | X | X | X |
| Printing a plan (A3, endless plot) | X | X | X | X |
| Card export (A4) | X | X | X | X |
| Share Cards | X | X | X | X |
The project roles for Agile Visual Board are assigned via the project settings of each project. The "Users and roles" item is called up in the project settings.
Figure 72. Agile Visual Board - Jira Project Settings - Users / Rights
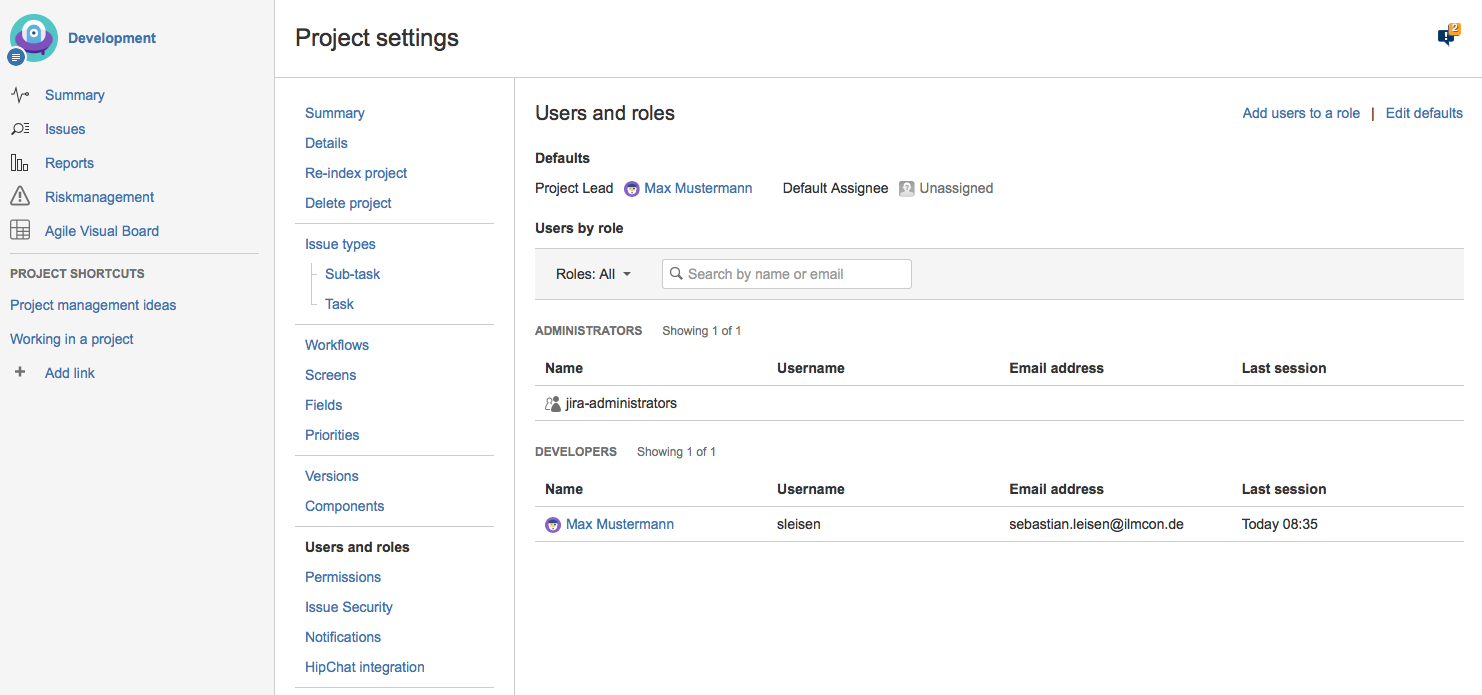
Existing Jira users can be added to a role using the "Add Users to a Role" function. The assignment of rights refers exclusively to the selected project.